Heat Loss Is Rarely Just the Windows
When a room feels cold no matter how high the thermostat climbs, drafty windows tend to get the blame. Sometimes that blame is fair. But heat loss in most homes is a more distributed problem - gaps around pipes and wiring, unsealed attic spaces, poorly insulated wall cavities, and openings around electrical outlets all contribute. In older homes where insulation has never been updated, the combined effect of these smaller leaks can be significant enough to push heating bills noticeably higher.
Guessing at the source rarely leads anywhere useful. The checks below are practical, low-cost methods for narrowing down exactly where conditioned air is escaping, so any fixes you make are targeted rather than speculative.
Visual Inspection
The lowest-cost starting point is a straightforward visual scan of the home. James Medina, an HVACR instructor at Universal Technical Institute, describes it simply: check around doors and windows for any openings where air and heat can escape.
Wooden frames deserve particular attention. Wood can decay over time, becoming soft or spongy in a way that creates uneven gaps even when the frame looks intact from a distance. Beyond the frames themselves, look for deteriorated weatherstripping, cracked caulking, and gaps around pipes or wiring passing through walls. Electrical outlets, light fixtures, and ceiling fans are also worth checking - all of these are penetrations in the building envelope that are easy to overlook during routine maintenance.
A visual inspection will not catch everything. Gaps inside wall cavities or in attic insulation are not visible from the interior. But as a first pass, it costs nothing and often turns up problems that are simple to address with caulk or weatherstripping.
Touch Test
On a cold day with the heating system running, walk slowly around the interior perimeter of the house and pay attention to what you feel near door and window frames. Heat escaping through a gap will create a cold sensation on the interior side, even when the source of the draft is small.
Medina also recommends checking around recessed lights, electrical outlets and receptacles, and baseboards during this walk-through. These are spots where air movement is easy to miss visually but detectable by touch, particularly on very cold days when the temperature difference between indoors and out is at its greatest.
You can extend this check to the exterior as well. Walking around the outside of the house and feeling for warmth escaping through frames can confirm problem areas identified from inside.
Smoke Test
A lit candle or an incense stick held near the edges of closed windows and doors provides a visible indicator of air movement that touch alone can miss. The method is straightforward: hold the smoke source close to the edge of a window or door frame and watch whether the smoke drifts toward the surface or pulls sharply toward a gap.
Medina describes the application in more detail: walk around the interior of the home along any wall that borders an unconditioned space - the exterior or an attached garage, for example - and watch for smoke pulling toward cracks or penetrations. When smoke is drawn toward a gap, it indicates air is leaving the conditioned space, carrying heat with it.
This test works best on a cold day when there is a meaningful pressure and temperature difference between inside and outside. On mild days, the air movement may be too subtle to produce a visible smoke response.
Snow Test
This check requires stepping outside rather than inspecting from within. Kevin Bohnet, HVAC program director at Fortis College, explains the principle: look at your roof after a light snowfall or frost and compare it to neighboring homes. If your roof shows significantly less frost or snow accumulation than the houses nearby, that difference is worth paying attention to.
The reason is straightforward. When attic insulation is inadequate, heat from the living space penetrates through the ceiling and into the attic, warming the underside of the roof enough to melt frost or light snow from below. A roof that clears faster than surrounding homes is a visible sign that heat is moving upward through the ceiling assembly rather than staying inside the conditioned space.
This test is specific to roof and attic heat loss. It will not reveal gaps around windows, outlets, or doors. Think of it as one data point rather than a complete picture, most useful for flagging attic insulation as a priority area.
Thermal Camera
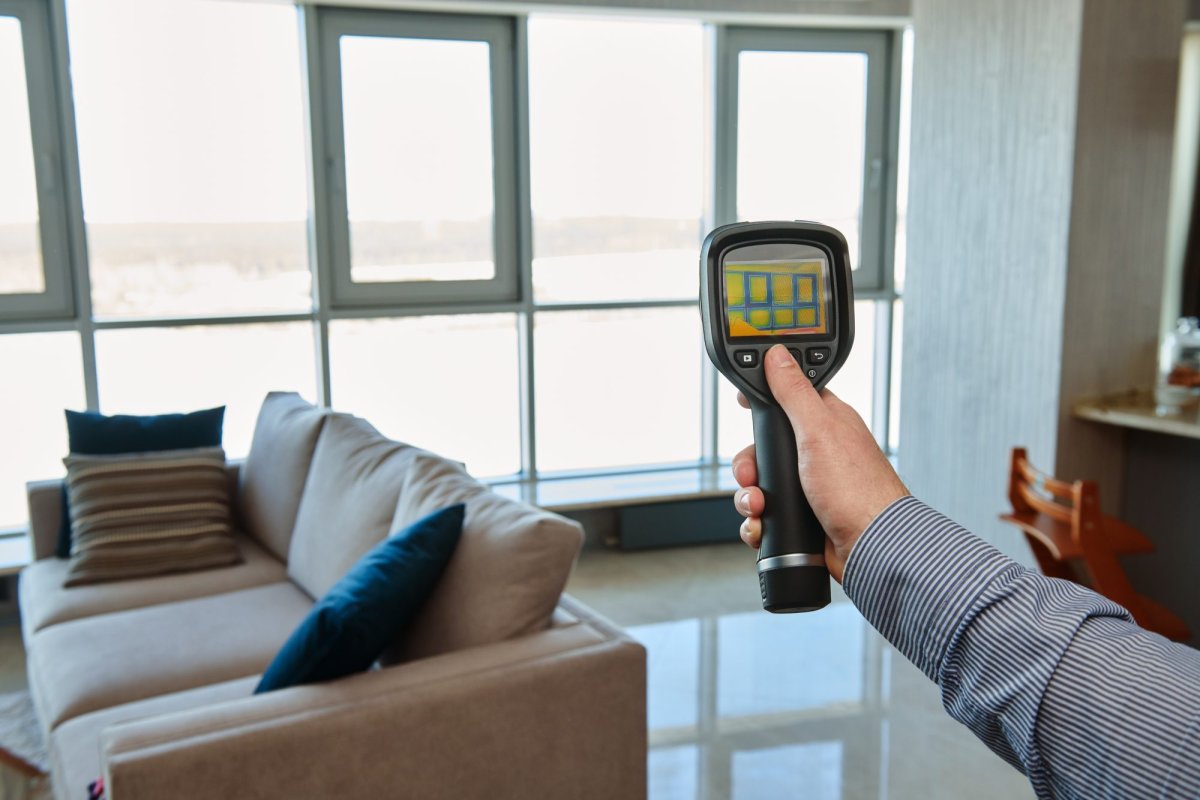
A thermal camera is the most detailed diagnostic option available for home use. The technology works because most objects emit infrared energy in proportion to their surface temperature. A thermal camera detects and measures that infrared energy and converts it into a visual image showing the relative temperature of surfaces across a scanned area.
In practice, this means pointing the camera at a wall, floor, ceiling, window, or door and seeing a color-coded image that makes temperature differences visible. A cold spot on an interior wall, invisible to the naked eye, appears clearly in a thermal scan. The same applies to areas around window frames, electrical outlets, and ceiling penetrations.
Medina recommends conducting this test on a cold day with the heat turned up inside the house. The larger the temperature difference between indoors and outdoors, the more clearly the camera will show where that contrast breaks down - which is exactly where heat is escaping.
One commonly referenced option is the TopDon TC005 Thermal Camera, which is capable of measuring temperatures between -4 and +1022 degrees Fahrenheit. Thermal cameras vary considerably in price and resolution. Entry-level models designed for home use are available at a lower price point than professional-grade equipment, though the level of detail they provide is correspondingly more limited.
What to Do After You Locate the Problems
Finding heat loss is only part of the process. Medina’s practical framing is a reasonable way to approach next steps: most homes will experience some degree of heat loss, and the goal is to mitigate it as much as possible by ensuring the home is properly insulated and sealed.
What that means in practice depends on what the checks above turn up.
Caulk and weatherstripping address gaps around windows and door frames. These are among the lower-cost fixes and are straightforward to apply without professional help. Existing caulk should be fully removed before new caulk is applied, since layering caulk over deteriorated material does not produce a reliable seal.
Outlet and switch plate gaskets are inexpensive foam inserts that sit behind the cover plates on exterior walls. They reduce air infiltration through one of the more commonly overlooked penetrations in exterior walls.
Attic insulation is the appropriate response if the snow test or a thermal scan suggests heat is moving upward through the ceiling. This is a more involved and expensive fix, and the right approach depends on the existing insulation type and attic configuration.
Air sealing around penetrations - pipes, wiring, recessed lights - typically uses spray foam or caulk and addresses gaps that weatherstripping cannot reach.
Not every problem identified during these checks will be equally significant. A single deteriorated window seal contributes less to overall heat loss than an uninsulated attic. Prioritizing by the size and location of the gap - with attic and ceiling losses generally ranking as higher impact than small frame gaps - tends to produce better results than trying to address everything at once.
A thermal scan conducted on a cold day with a significant indoor-outdoor temperature difference will give the clearest picture of which areas deserve the most attention first.